
Working with AI
Work with an assistant
Revise a draft, repair a build, find sources, and follow the assistant’s work inside your project.
このコンテンツはまだ日本語訳がありません。
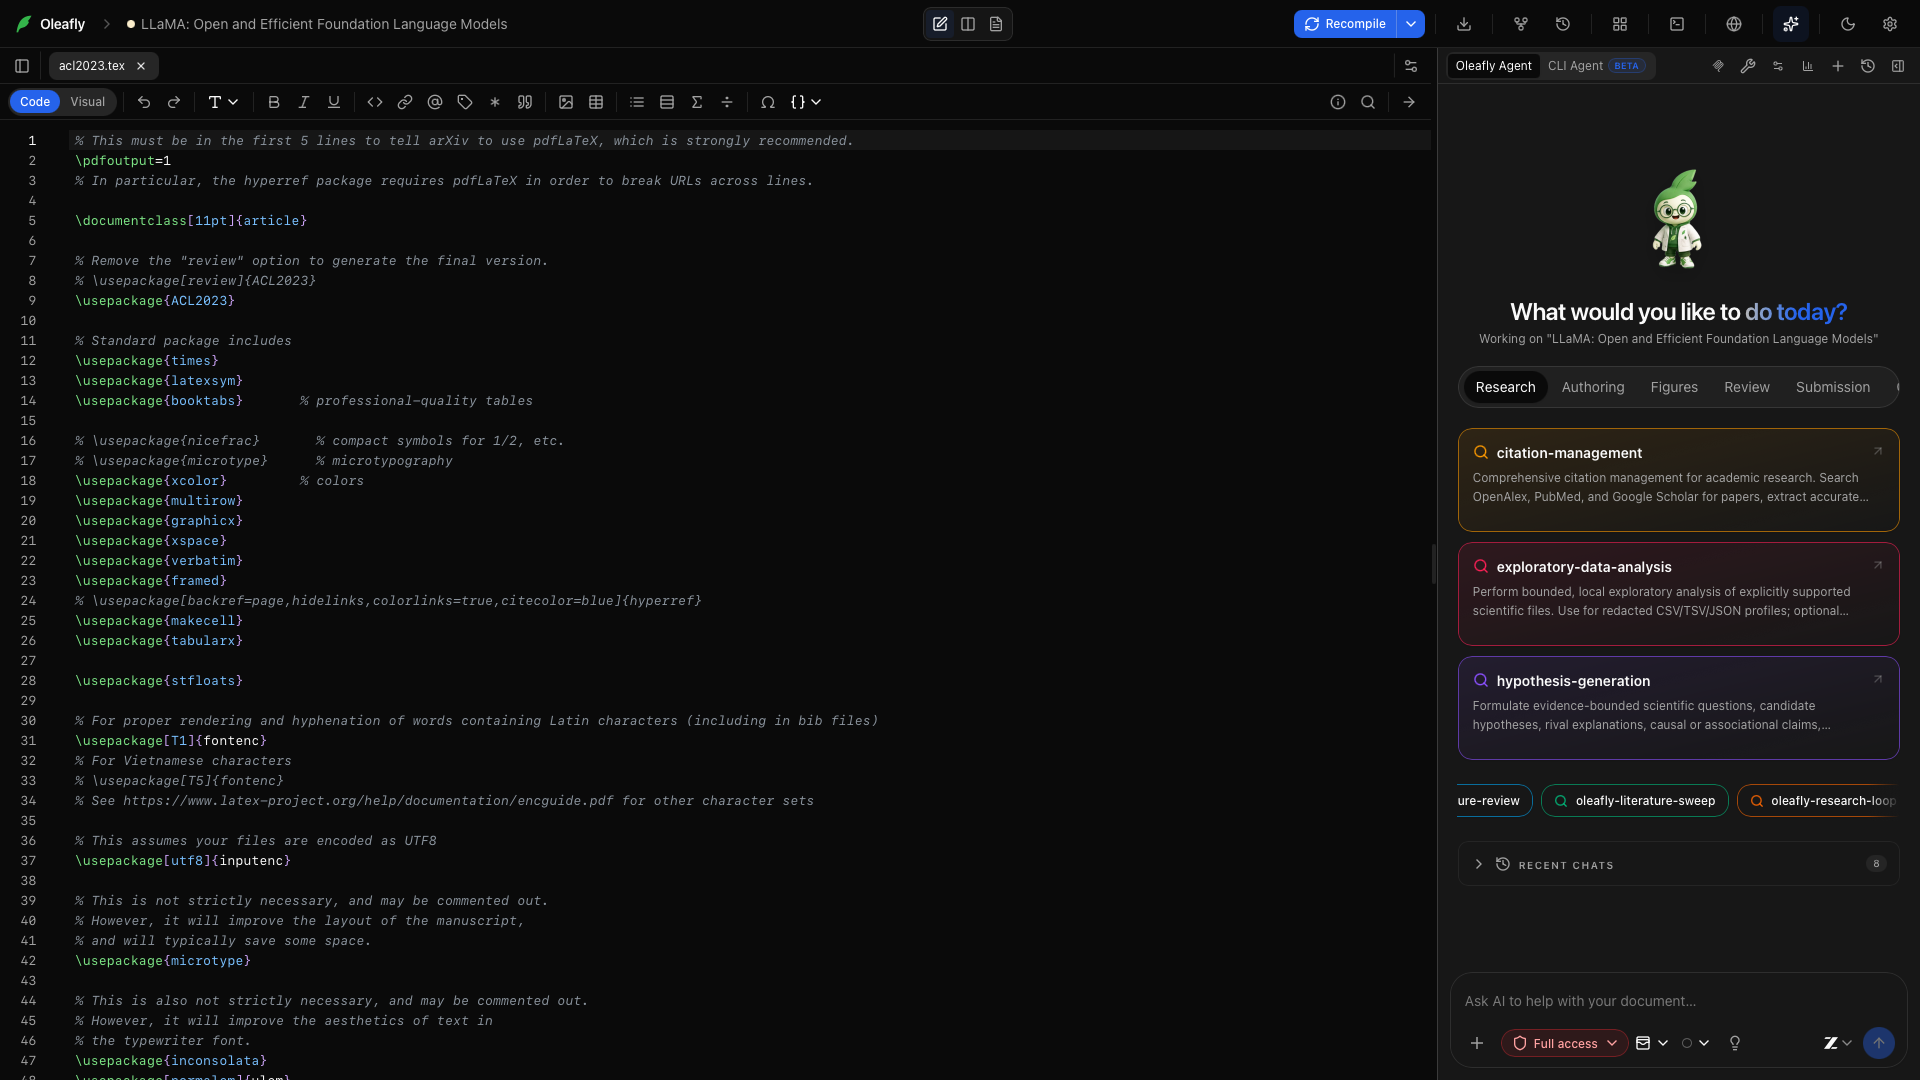
Ask for the result you need. The assistant can read your files, make edits, compile the paper, and inspect the output in the same workspace.
Compile this paper, read the errors, and fix the build. Compile again to check the result.
Open the assistant panel and choose a connected model or CLI agent. Set up AI covers both routes.
Give it the right context
Section titled “Give it the right context”Mention a file or folder with @, attach a reference document, or select a passage before asking. File mentions carry the file content; folder mentions carry a listing so the assistant can find the material it needs.
The built-in assistant starts with project context such as the active file, selection, structure, and compile state. It can read more through tools. Linked folders let you reference data and PDFs outside the manuscript folder.
Follow the work
Section titled “Follow the work”Replies show text, tool activity, proposed changes, and progress in order. Expand a tool card to read its output. A compile result can lead you to the log or PDF; a literature result can lead you to a paper.
| Ask it to… | What it can work with |
|---|---|
| Improve a section | Project files, selected text, your instructions, and editable diffs |
| Fix a build | The compiler, diagnostics, logs, and PDF text |
| Add supporting literature | OpenAlex search, metadata lookup, and your bibliography |
| Draw a diagram | TikZ or PGFPlots in LaTeX, CeTZ or fletcher in Typst, a preview of the figure on its own, and figure insertion |
| Review the paper | The draft, references, research notes, and review skills |
Tools depend on the document engine and selected runtime. Use the tools control to choose which groups are available. The figure tools work in LaTeX and Typst projects, not in Markdown.
Literature search uses the OpenAlex API key and contact email saved in Settings → Integrations → Citation Search. If you connect alphaXiv, the assistant can also search and read papers there and use your alphaXiv library. It asks you before each alphaXiv call.
Plan before editing
Section titled “Plan before editing”Turn on Plan for a job that needs a few decisions first. The assistant can read and search while preparing a checklist. It waits before editing, compiling, or running commands.
When the plan appears, choose Approve plan or Revise. You can also type feedback. The progress pill shows the current step and changed files while the work runs. Approving a plan keeps your selected edit-approval policy.
Some models answer in Plan mode without writing a plan. When that happens, a note under the reply says No plan to approve yet. Ask the assistant for one, or turn Plan off. If a revision comes back identical, the note says The plan is unchanged.
Review proposed edits
Section titled “Review proposed edits”Choose Ask for approval when you want to inspect changes before they are applied. Read the diff and approve or reject the action. Approve for me and Full access give the assistant more autonomy; the active policy appears in the interface.
Whatever the policy, you can look over and undo a turn’s changes after it ends. For work you want to review only after the agent finishes, on a copy of the project, use a research task. Tasks let you apply selected files.
Review and undo a turn
Section titled “Review and undo a turn”When the assistant or a CLI agent changes files, a line under its reply says how many, such as Changed 3 files, with the lines added and removed.
- Review lists each file as Added, Modified or Deleted. Click a file to see its diff.
- Undo on a file puts it back the way it was before the turn. Redo brings the change back.
- Undo all undoes the turn’s source files in one step. Build output such as
.auxand.logfiles is listed apart under Build files updated and never undone.
Undo leaves a file alone if it changed again after the turn, and marks it Changed after this turn. Undo all also skips files you edited yourself during the turn and files the assistant committed to Git, which show Committed in and the commit. Undo and Redo become available once the agent finishes. If another agent changed files in the same project at the same time, undo the files one at a time.
Undo works from a copy of the project that Oleafly makes before each turn. The copy goes in Oleafly’s own data folder, ~/.oleafly/agent-turns, never in your project. A file over 25 MB isn’t copied, so Undo can’t put it back. A project with more than 20,000 files or 512 MB, or one that takes too long to copy, gets no copy for that turn, and the line says Undo isn’t available. Oleafly keeps the copies for every turn in the last 14 days and for the newest 100 turns of each project. After that, the turn says Undo is no longer available for this turn.
Change direction mid-run
Section titled “Change direction mid-run”Send a follow-up while the assistant is working, then choose Steer now to deliver it at the next safe point. For example:
Keep the existing notation. Focus the revision on the explanation below Equation 3.
If the run finishes first, the message becomes the next turn. Stop cancels an active run.
Reuse a good workflow
Section titled “Reuse a good workflow”Type / to choose a skill, or use Record a skill after a useful conversation. A skill can capture a procedure you repeat across papers: check claims, prepare figures, or draft a response letter.
Several bundled skills know Typst as well as LaTeX. oleafly-figure-prep draws CeTZ and fletcher figures, citation-management can write Hayagriva bibliographies, oleafly-response-letter writes the letter in Typst for a Typst paper, and oleafly-pre-submission has checks for Typst projects.
Personas and standing instructions live in AI settings. Use them for preferences such as spelling, tone, and notation.
History and usage
Section titled “History and usage”Open chat history to return to an earlier conversation. Replies with a saved restore point offer Restore code to before this response. For document history beyond a chat, use Versioning.
The usage counter opens the usage report, where you can filter work by project, agent, model, and date.
Hosted models receive the context supplied to them. Use a local model when you want model requests to stay on your machine. Float the assistant, the picture-in-picture button in the assistant header, lifts the panel over the editor. Dock it back returns it to the sidebar.
New chat
Section titled “New chat”Click New chat in the assistant header to start a separate conversation. Use a new chat for a distinct question or chapter so its context is easier to follow. New chats begin with your configured default model.
Chat history
Section titled “Chat history”Click Chat history to reopen a conversation. Continue from its existing messages when you want to revise a previous result or ask how it was produced.
Attach files
Section titled “Attach files”Open the attachment menu to add supporting material. The file picker accepts images, PDFs, text, LaTeX, Typst, BibTeX, and Markdown files. Review the attachment chips above the composer before sending.
Remove an attachment
Section titled “Remove an attachment”Use the remove control on an attachment chip to exclude it from the next message. This removes the attachment from the draft message, not the original file on disk.
Mention a file or folder
Section titled “Mention a file or folder”Type @ and choose a matching project item. A file mention supplies file content; a folder mention supplies a listing the assistant can use to decide what to read next. Name the relevant section in your prompt as well when the file is long.
Prompts
Section titled “Prompts”Open Prompts for ready-made starting requests. Selecting one fills the composer so you can tailor it to the current paper before sending. Include a concrete target, such as a section name or failed compile.
In a Typst project the prompts ask for Typst instead of LaTeX. Fix LaTeX errors becomes Fix Typst errors, TikZ figure becomes CeTZ figure, and the equation, table and presentation prompts produce Typst math, Typst tables and a Typst slide deck.
Persona
Section titled “Persona”Choose a persona from the composer for a saved instruction preset. Select None to return to your default instructions. An active persona replaces the default custom-instruction text; Instructions and approvals explains how to configure both.
Model selector
Section titled “Model selector”Choose a configured provider and enabled model. Pick a model with the capabilities the task needs: a vision task requires image support, while multi-step project work requires working tool support. Use Check again if a capability check needs to be retried after changing the endpoint or model.
Reasoning effort
Section titled “Reasoning effort”When the selected model or runtime offers a reasoning control, choose its effort level for the task. Available values depend on that model. Higher effort can increase response time and usage; a short wording change usually needs less than a detailed manuscript review.
Click Send to submit the message with its selected attachments, model, persona, and approval mode. Read the task back before sending if it involves several files.
Click Stop to cancel the active run. Inspect any changes already made before asking the assistant to continue; stopping a run does not undo completed edits.
Scroll to bottom
Section titled “Scroll to bottom”Use Scroll to bottom to return to the latest message after reading earlier tool output. You can scroll up to inspect the conversation while work continues.
Queued messages
Section titled “Queued messages”Send a follow-up during an active run to queue it. Steer now passes the instruction at the next safe point. Use Discard queued message to remove a follow-up you no longer want delivered.
Persistent goal
Section titled “Persistent goal”Set a goal when several turns should work toward the same outcome. Enter the objective and choose Save goal. Click the goal chip to edit it, or Clear goal to remove it. Keep the goal concrete, such as preparing the methods section and its figures for review.
Assistant settings
Section titled “Assistant settings”The header’s settings control opens AI configuration. Use it to connect providers, enable models, edit instructions, or manage personas and skills.
Assistant MCP settings
Section titled “Assistant MCP settings”The MCP settings control opens the external-server configuration for tools used by the built-in assistant. This is separate from the server that lets an external application control Oleafly. See MCP connections.
Usage report
Section titled “Usage report”Click the usage indicator or Usage report to inspect the recorded work. Use the report’s filters to compare projects, models, runtimes, or date ranges. Usage and budgets explains the fields and budget controls.
Review one section from start to finish
Section titled “Review one section from start to finish”- Select the section and mention its source file in the composer.
- Choose a connected model and Ask for approval.
- Ask: “Review this section for clarity. Preserve the claims, numbers, labels, and citation keys. Propose the changes first.”
- Read the proposed edit and its explanation.
- Approve the changes you want, then ask the assistant to compile.
- Inspect the updated section in the PDF, including references and figure placement.