
Start a new project
Choose a research workspace, import an existing manuscript, or begin with a template.
本頁內容尚未翻譯。
Click New project in the workspace dock. Choose how you want to begin: organize a study, bring in existing work, or start from a prepared layout.
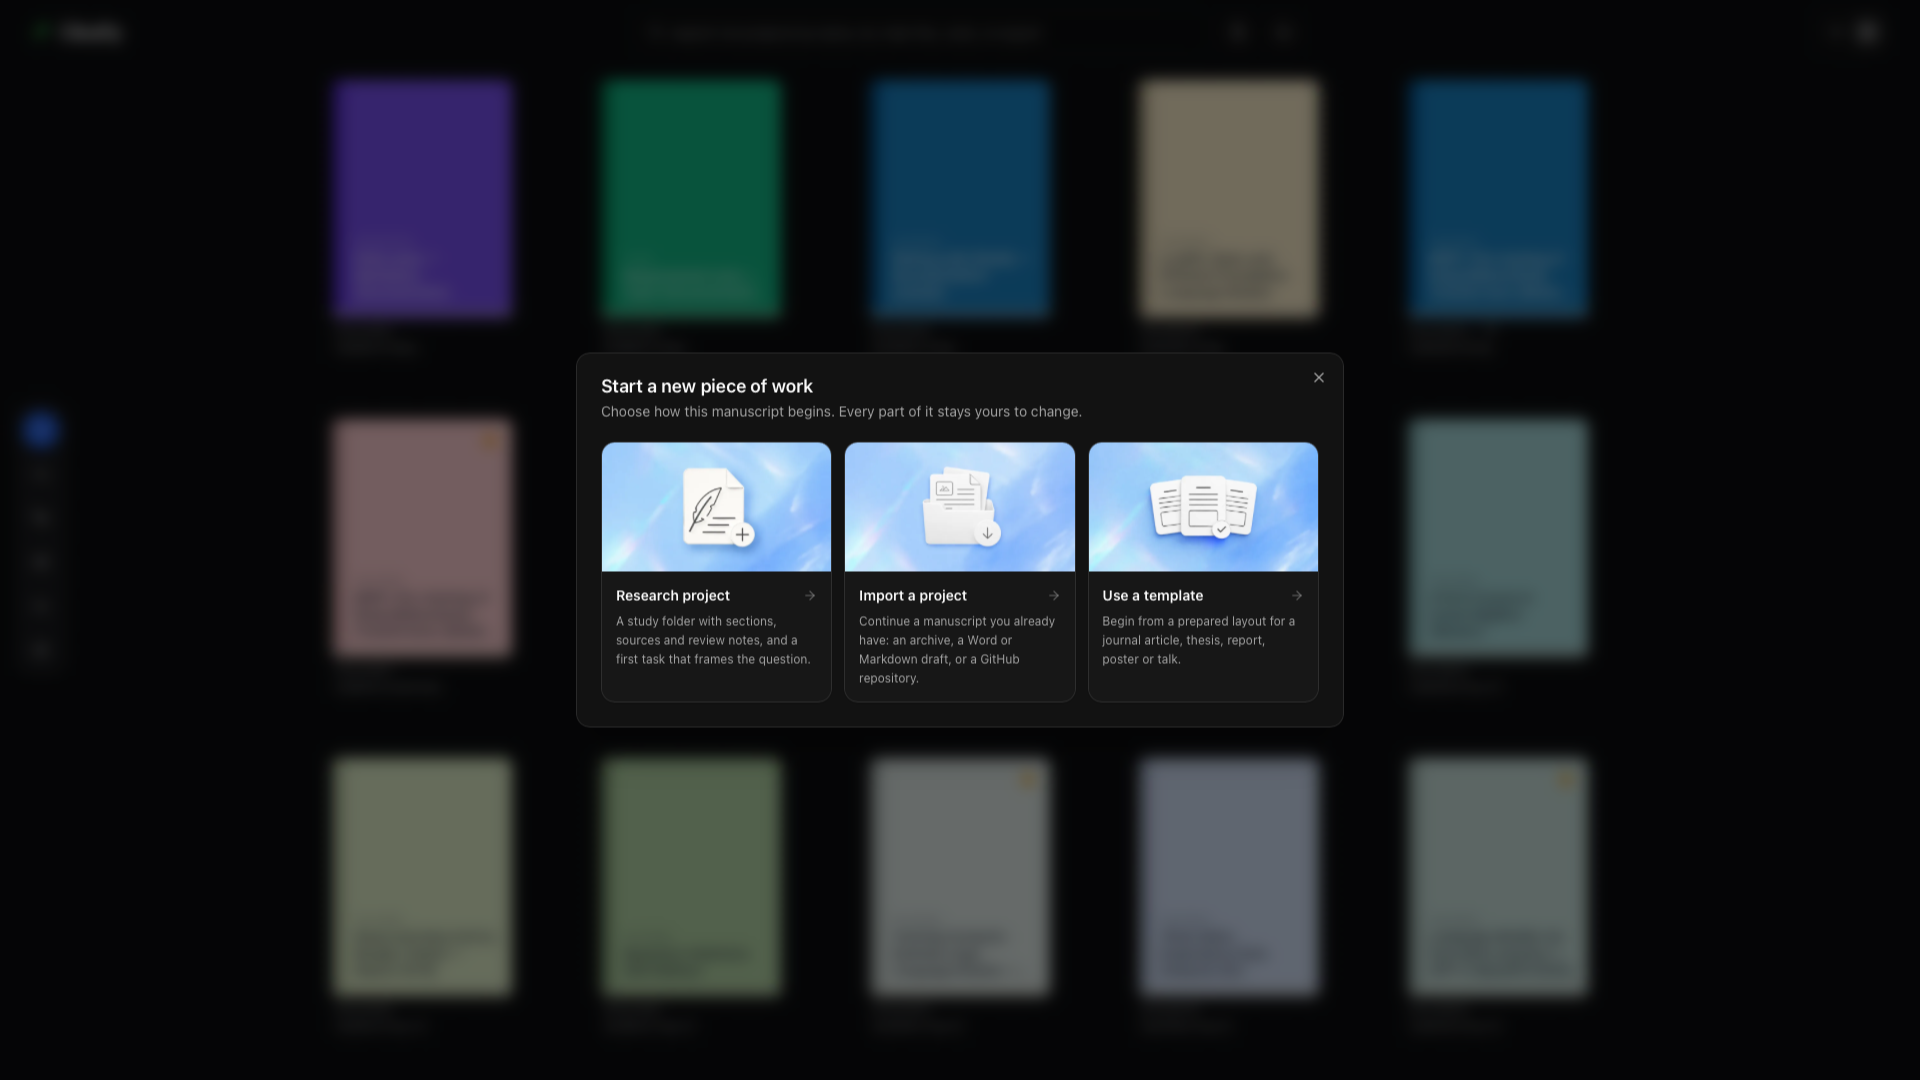
| Starting point | Choose it when | What happens next |
|---|---|---|
| Research project | You want a manuscript with room for sources, analysis, and review notes | Choose a language and study starter, then inspect the proposed files |
| Import a project | You already have an archive, draft, or repository | Select the import source and create a local project |
| Use a template | You know the document layout you need | Browse and preview a template, or generate one with AI |
Research project
Section titled “Research project”This route creates a working study folder around your manuscript. It gives you places to keep the evidence and review work that belong with the paper.
Project name
Section titled “Project name”Enter a descriptive name. The preview updates as you type so you can see the proposed title and files before creating anything.
Document engine
Section titled “Document engine”Choose LaTeX, Typst, or Markdown. This determines the main source file and editor tools. Read Choose a document engine if you are starting with a new format.
Study starter
Section titled “Study starter”Choose the starter that matches the work. An Article starts with the structure of a research paper, including an abstract and sections for the introduction, methods, results, discussion, and conclusion. Review the starter’s description and file preview before continuing.
First research task
Section titled “First research task”Read the task shown below the starter. For an Article, it frames the research question and article outline. The task provides a starting point for your work; creating the project does not produce research findings for you.
Project preview
Section titled “Project preview”Select files in the preview tree to inspect their contents. An Article includes the manuscript and folders for analysis, figures, research notes, sources, and review notes. The Main document label identifies the file used to compile the paper.
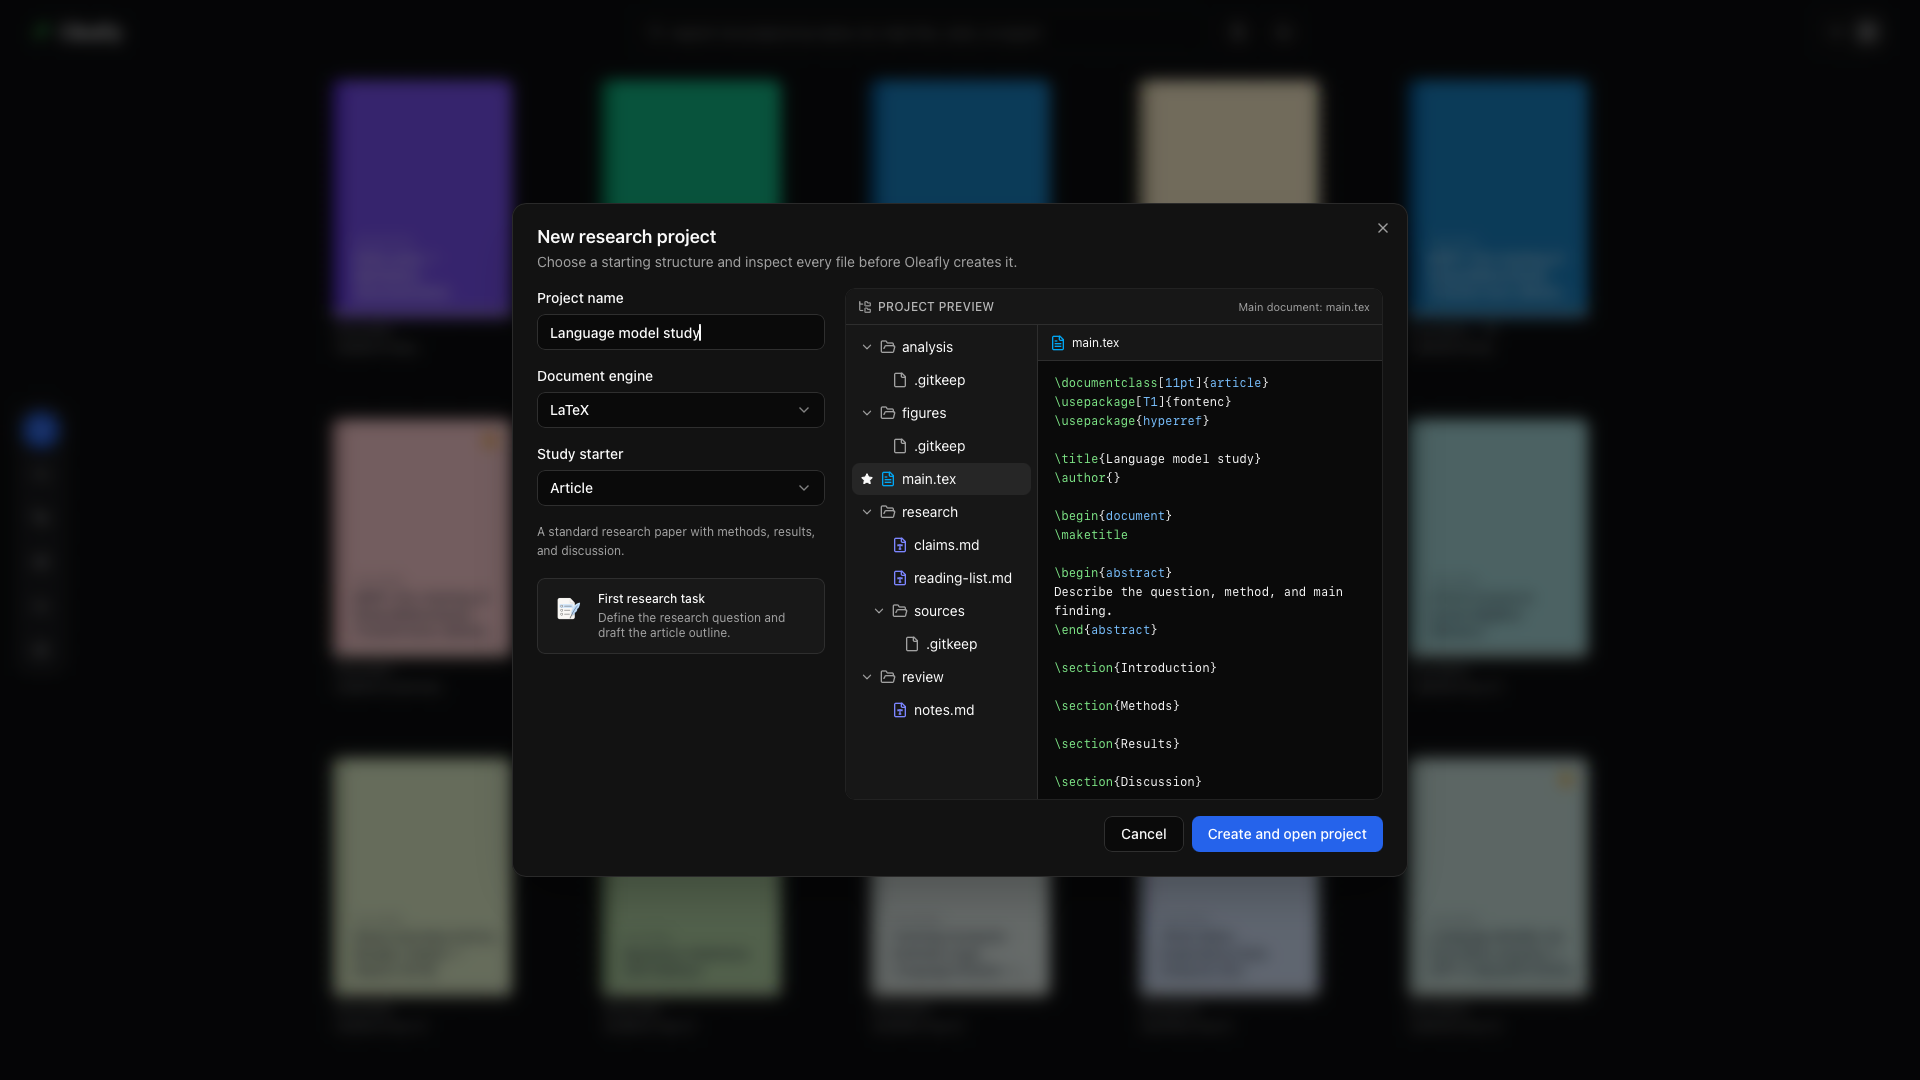
Create and open project
Section titled “Create and open project”When the preview looks right, choose Create and open project. Your new project opens in the writing workspace. Start with the research workspace guide to connect sources and organize tasks.
Cancel
Section titled “Cancel”Close the dialog or choose Cancel to leave without creating the project.
Import a project
Section titled “Import a project”Choose this route to continue work you already have. The dialog offers a project ZIP, a Word document, a Markdown document, or a GitHub repository. Oleafly creates a local project from the selected input.
Use a ZIP for an existing project with multiple source files and figures. Word and Markdown import use a conversion workflow; inspect the converted manuscript and compile it before continuing. For native Markdown writing, create a Markdown project and bring your source and assets into it.
Follow the import steps for each format →
Use a template
Section titled “Use a template”Open the gallery, search or filter for the kind of document you need, and inspect the preview. Templates can provide the layout for an article, thesis, report, resume, poster, or presentation. A blank starting point is useful when you already have source code to paste.
Some templates download a pack or fonts on first use. Prepare those downloads while online if you plan to work offline.
Browse, preview, and create from a template →
Generate a template with AI
Section titled “Generate a template with AI”Choose the AI generation option in the gallery when you want to describe your own starting layout. Give the assistant the document type, required sections, page size, and formatting preferences. Preview the result, refine it, and save the template for reuse.